
ID cards in the ESL classroom
Language Skills: Writing and talking about personal contact information
Lesson Time: 30 – 40 minutes
Student Level: Suitable for all levels

👩🏫The first lesson of an ESL class can sometimes be a bit awkward for both the teacher and the students. If you are a new ESL teacher, you may struggle to think of ideas for what to do for that first all-important lesson. After all, you don’t know the students, they don’t know you, and if it’s a brand-new class, they may not know each other.
Accordingly, making ID cards is a nice, gentle activity for any first lesson. The exercise can be easily adapted for different age groups and ability levels and can be used as an icebreaker for classes where students don’t know each other well. The completed ID cards also help the teacher become familiar with their students and put names to faces quickly.
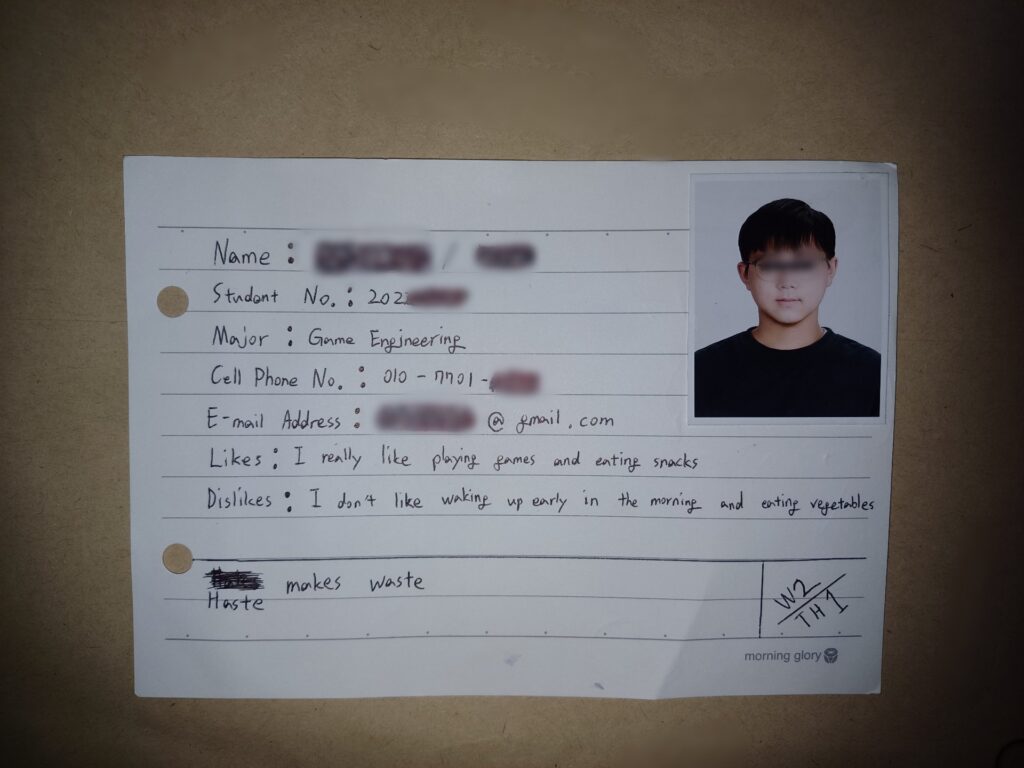
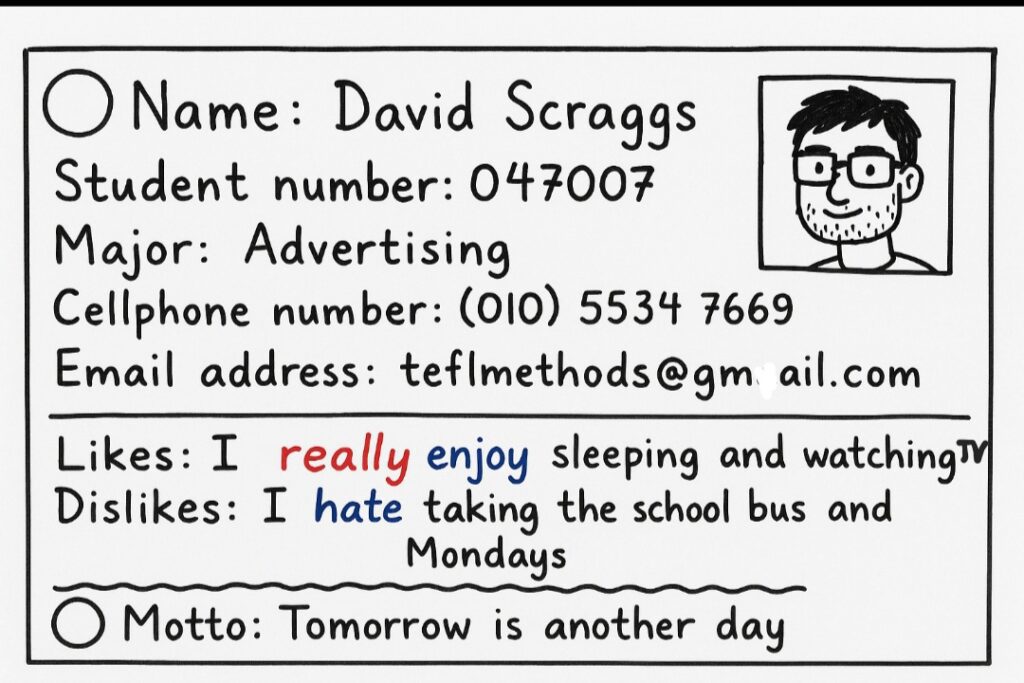
I recommend size A6 for most students. This first photo shows an example of a completed university-level ID card.

For lower-level students who write less, I use the A5 format. Here is an example of a grade 4 elementary school card.
The Lesson
👩🏫 The teacher distributes one card to each student and draws the front of the card out on the board, indicating that the punch hole should be in the top left corner (have a couple of spare cards ready for the students who will invariably get this wrong).
Next, the teacher draws a square in the top right corner to indicate where the ID photo/picture will be placed (I usually quickly sketch out an unflattering version of myself, but a simple face will suffice).
For older classes, the teacher requests that students bring a passport-type photo to affix to the card. (You may be lucky to get the whole class to bring in a picture, but most students usually have a spare one.)
For younger classes, the students enjoy sketching a picture of themselves.
👩🏫The teacher informs the students that they will write down some personal information on their cards and asks them what the first thing they should write down is, which, of course, is their name.
The teacher then elicits from the students other personal and contact information that they think should be included on their cards, writing down their suggestions. Depending on the class’s age and level, these may vary.
As each item is added to the board, students follow along and add it to their card.
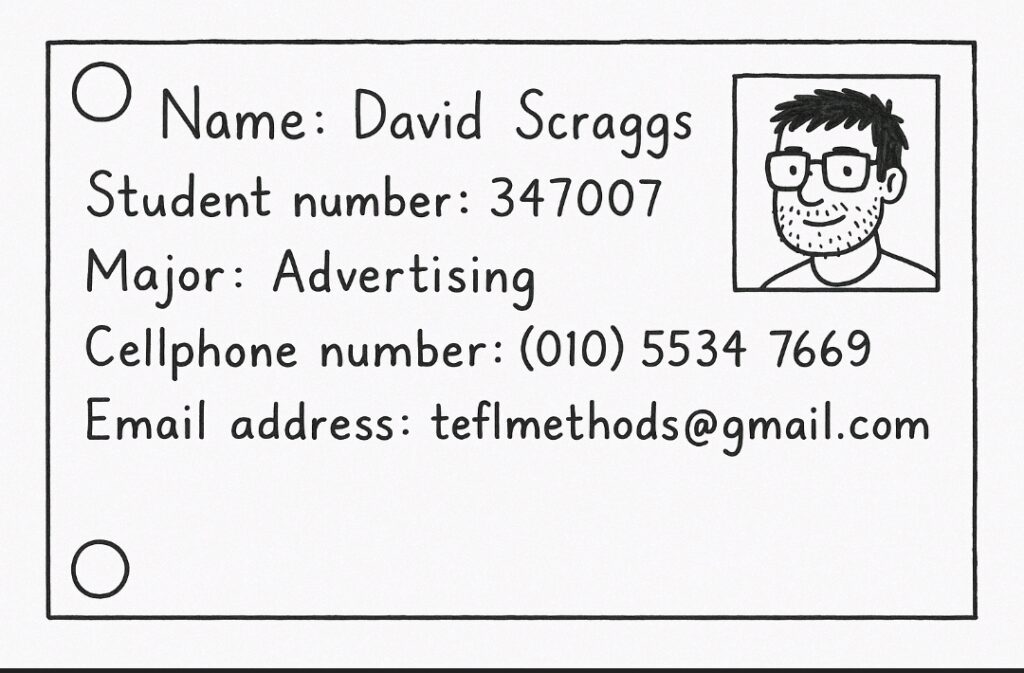
👩🏫This is a whiteboard example of an ID card for a university-level class.
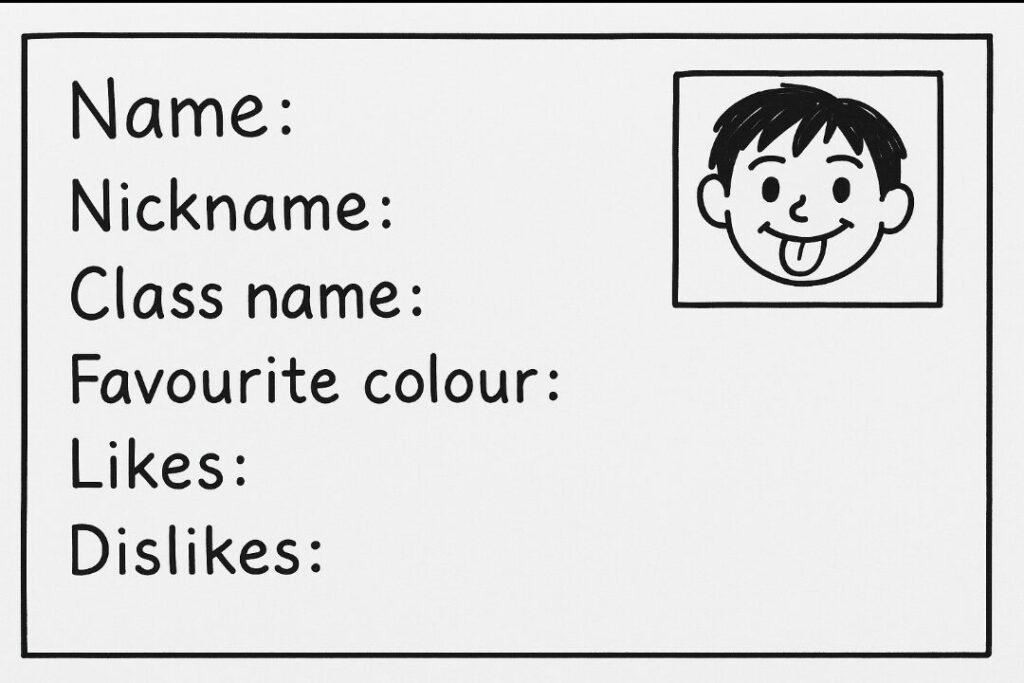
👩🏫This is a whiteboard example of an ID card for a junior class.
Questions and answers
👩🏫Once this stage is completed, the teacher can ask the students a few” What is your…..?” questions. Starting from the top of the card:
What’s your name?
Here, the student often will give a long-form answer:
My name is Julia Sanchez
So this is a good opportunity for the teacher to demonstrate a short-form answer on the board:
What’s your name? My name is Julia Sanchez —–> It’s Julia Sanchez
What’s your major? It’s nursing
…and so on.
👩🏫The following picture shows a board with some further valid speaking points. Here I’m explaining how to say the highlighted areas in English (1)-(5):
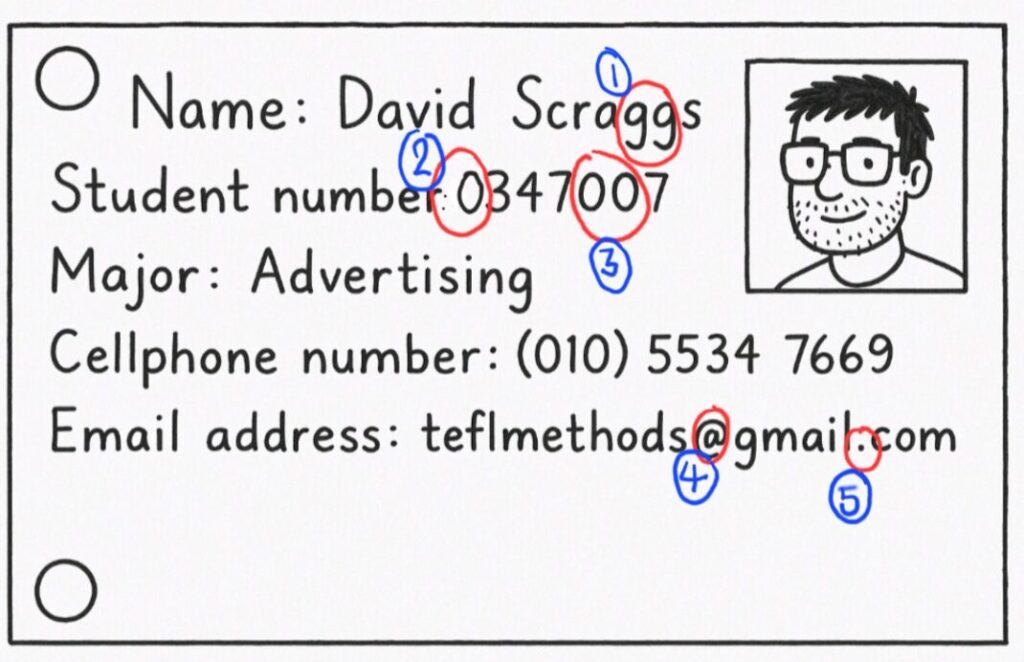
1)When spelling my name, it is easier and more precise to say ‘double g.’
2)We can say ‘oh’ or ‘zero’. Which one is easier to say?
3)When saying a phone number, we can say ‘double’ if two numbers are the same. Here, I would say ‘double oh’.
4)The ‘@’ character is pronounced as ‘at’ when saying an email address.
5)5. The ‘ . ‘ is pronounced as ‘dot’ when saying an email address.
Writing about likes and dislikes
👩🏫Once I have some basic contact details, I add two more headings where the students can express a little bit about themselves:
Likes:
Dislikes:
👩🏫For lower-level classes, I keep it simple and write up an example for the students to follow. For example:
Likes: I like pizza and computer games
Dislikes: I don’t like cucumbers and homework
The above example can be used to illustrate to students that some nouns are countable (e.g. computer games) and require a plural ‘s’, whereas others (e.g. homework) are uncountable and do not.
👩🏫For higher-level classes, I like to make it a little more challenging by asking students to write about the things they like and dislike doing, using the ‘-ing’ gerund activity form. For example:
Likes: I like eating pizza and playing video games
Dislikes: I don’t like eating cucumbers and doing homework
-I also introduce the option of using other adverbs and verbs to help the students express themselves:
Likes: I really enjoy eating pizza and playing video games
Dislikes: I really hate eating cucumbers and doing homework
Students often make mistakes when writing this part of the card. It’s a good idea to circulate the class and point out mistakes as students make them.
Finally, for higher-level classes, if there is enough space on the card, I ask the students to write down a phrase or motto they like in English. If they don’t know one, well, everyone has a cell phone!
So, for a higher-level class, the finished card on the board should resemble this.
The Back of the Card
👩🏫Don’t forget the back of the card!
Recording homework grades and exam scores can be helpful. Again, this will vary for each age or level. The card below shows the points a university student accrued over a semester. The student was graded on homework, classwork, the midterm exam, the final exam, and attendance.

👩🏫For younger classes, the reverse side of the card can be used as a sticker reward space. Have the students draw two sides of a river bank and sketch some stepping stones in between. Whenever students win a game or complete a task, they get to put a sticker on a stone. This student is well on their way to a brand-new eraser…woohooo!

Review Exercise: ID Card Information Exchange
👩🏫Once the students have written out their ID cards, a follow-up speaking activity can serve as a review exercise in the next class.
-For the activity, the students are divided into pairs (facing each other if possible).
-The teacher hands out fresh blank cards to each student.
One student takes on the role of asking the questions, and the other student answers them.
-The exercise aims for the first student to correctly write down all of the second student’s information on the ID card by asking ‘What is/are your…’ questions. For example:
What’s your first name?
What’s your phone number?
What are your interests?
The answering student replies using the short, concise answer style that they were taught in the previous class.
A couple of useful expressions we look at in this lesson will be helpful for this review exercise.
The two expressions are:
Can you repeat that, please?
How do you spell…..?
During the exercise, the teacher circulates around the classroom to check and encourage the students to use these expressions, helping them write down the correct information.
Once the card is completed, the two students can check for accuracy against the original ID card and then switch roles.
Notes
👩🏫Regarding the storage of ID cards, if you entrust them to your students, they will likely lose, tear, or have their dog eat them. To prevent this, collect them at the end of each lesson and keep them safe and dry, attached to a binder ring.
………………………………………………………………………………………………………………………………………………………………………………………………………………………………………………..
For a whole host of fun exercises to do in the classroom for students of all ages and levels, I have a one-stop classroom activity book available……
Ok, that’s a wrap! Catch you in the next class