
Describing a picture/photo
Age: 10 years and above
Level: Intermediate/Advanced
Set up time: 5 mins
Running time: 15-25 mins

This is a fun ESL lesson to teach, and the students also really enjoy the challenge. In the lesson, one party describes a painting in detail, and the other party listens and sketches out the scene, including as many small details as possible.
The painting on the left is ‘American Gothic‘(1930) by Grant Wood.
How would you describe it to your students?
Which part of the painting would you start describing first?
In what order would you describe things in the scene, and what minor details would you include?
Lastly, what language structures would you use so that students can listen and sketch out the picture, including the fine details that give the painting its unique feel?
Lesson Plan
👩🏻🏫This exercise should first be modeled with the teacher taking the describing role. In this way, the teacher can methodically and clearly describe a picture that serves as a model for students to follow when it is their turn. Subsequent exercises should see the students working together in pairs.
Teacher to Student
👩🏻🏫Below is a part of the transcription of the teacher (me) describing American Gothic to a class of my students. I’m trying to use language and structures that the students have already had some practice with in previous lessons. If I need to describe an object they may not know the word for (in this case, dungarees), I talk about it so they can guess what I am describing.
Underneath the transcription, you can see a few examples of the picture that the students sketched after listening to my description. Don’t scroll down yet, though! Read through the transcription and refer to the original image.
For readability, the teacher’s voice and actions are in these colors.
Okay, first, turn your sheet of paper to portrait style, like this (the teacher holds up and turns their sheet of paper to portrait style).
In this picture, there are two people: a man and a woman. I think they might be a husband and wife. They are standing at the front of the picture. The man is on the right, and the woman is on the left. I will describe the man first. He is pretty old, and I think he is in his late fifties or early sixties. He looks tall and slim, a little taller than the woman, and his head starts about here (points to the paper). Starting from about here, I can see his body in the picture (the teacher points to their own waist), but I can’t see his arm or shoulder. They are outside of the picture.
So the man has a long head and a long, thin face. Looking at his hair, I can see that he is pretty bald, but there is a small amount of hair on the top and sides of his head. As I said, he has a long, thin face. He also has a long, straight nose. Describing his eyes, he has big, round, cold eyes. Oh, and he’s wearing glasses, but they’re not square-shaped glasses. They are round-shaped. He looks unfriendly and grumpy, and he isn’t smiling.
He is wearing a white shirt, but the shirt doesn’t have a collar. I can see two buttons on the shirt. Over the shirt, he is wearing a pair of dungarees. Dungarees are similar to jeans, but they are longer and come up here (indicates), with straps.
Over the dungarees, he is wearing a long black jacket. As I mentioned, his left arm is outside the picture. In his right hand, he is holding a fork. It isn’t a small fork—it’s a long, thin fork—like a farmer’s fork…and it has three points (indicates). Ok, so now let’s talk about the woman...
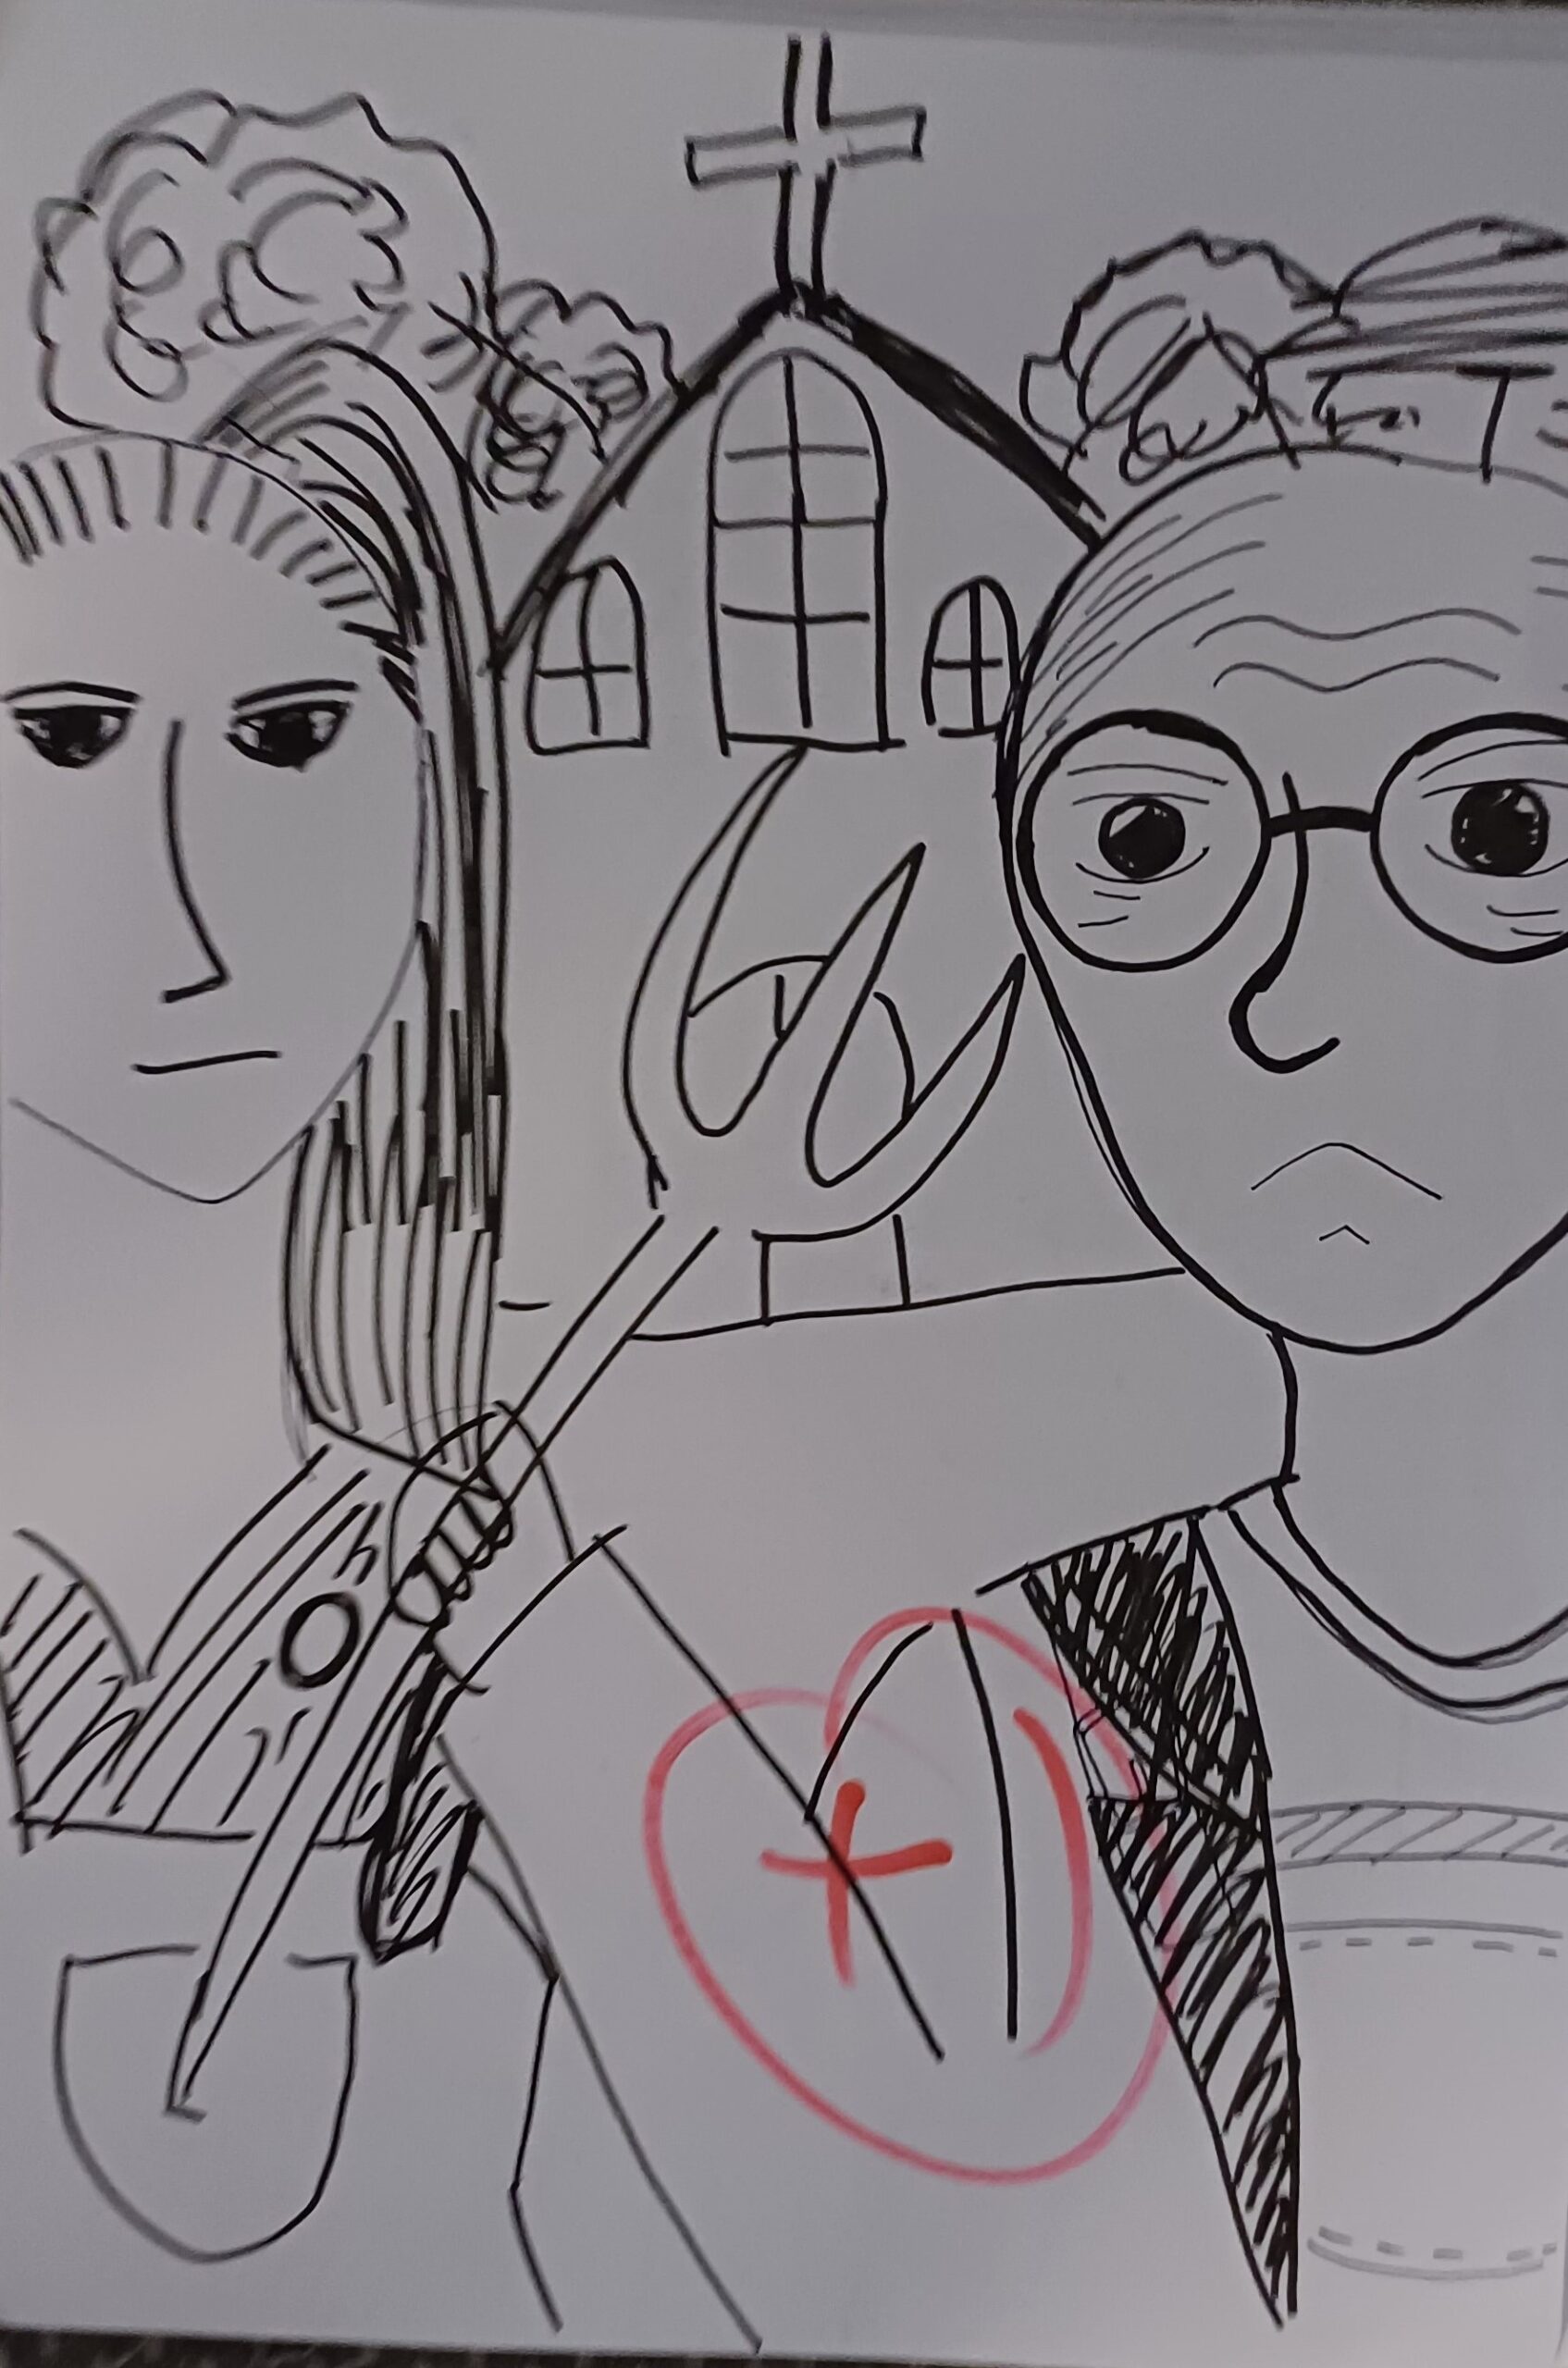
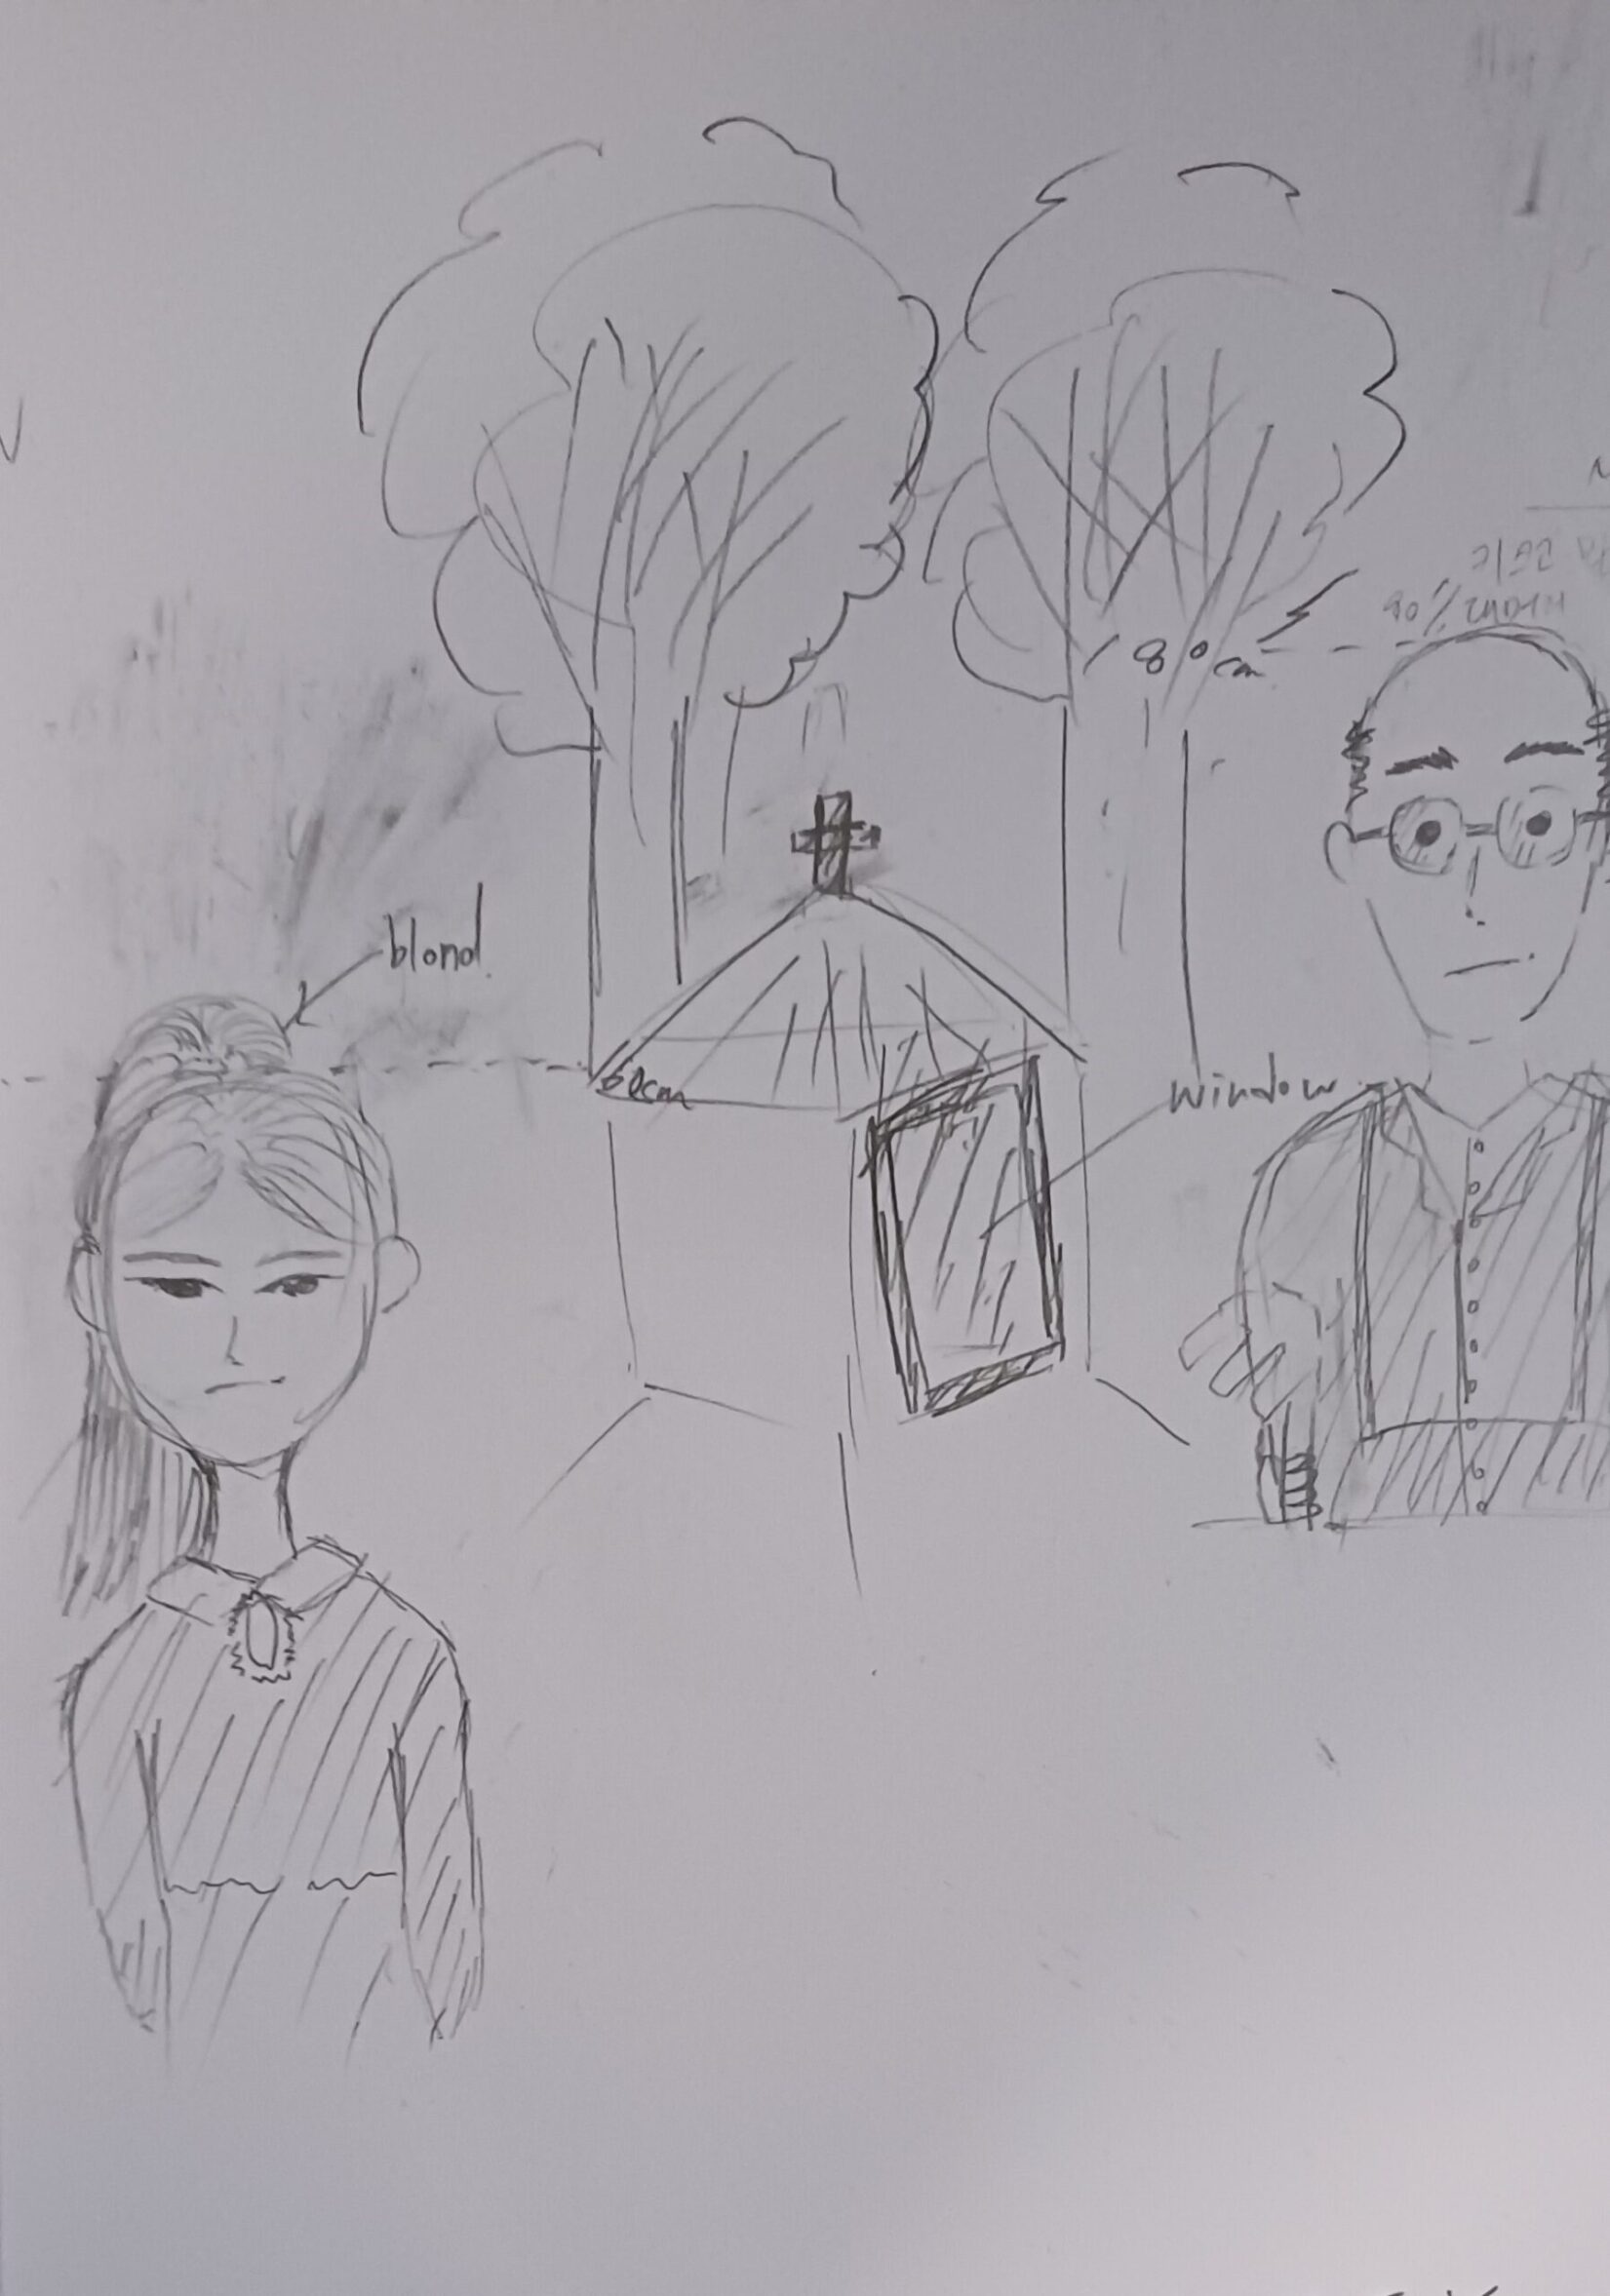
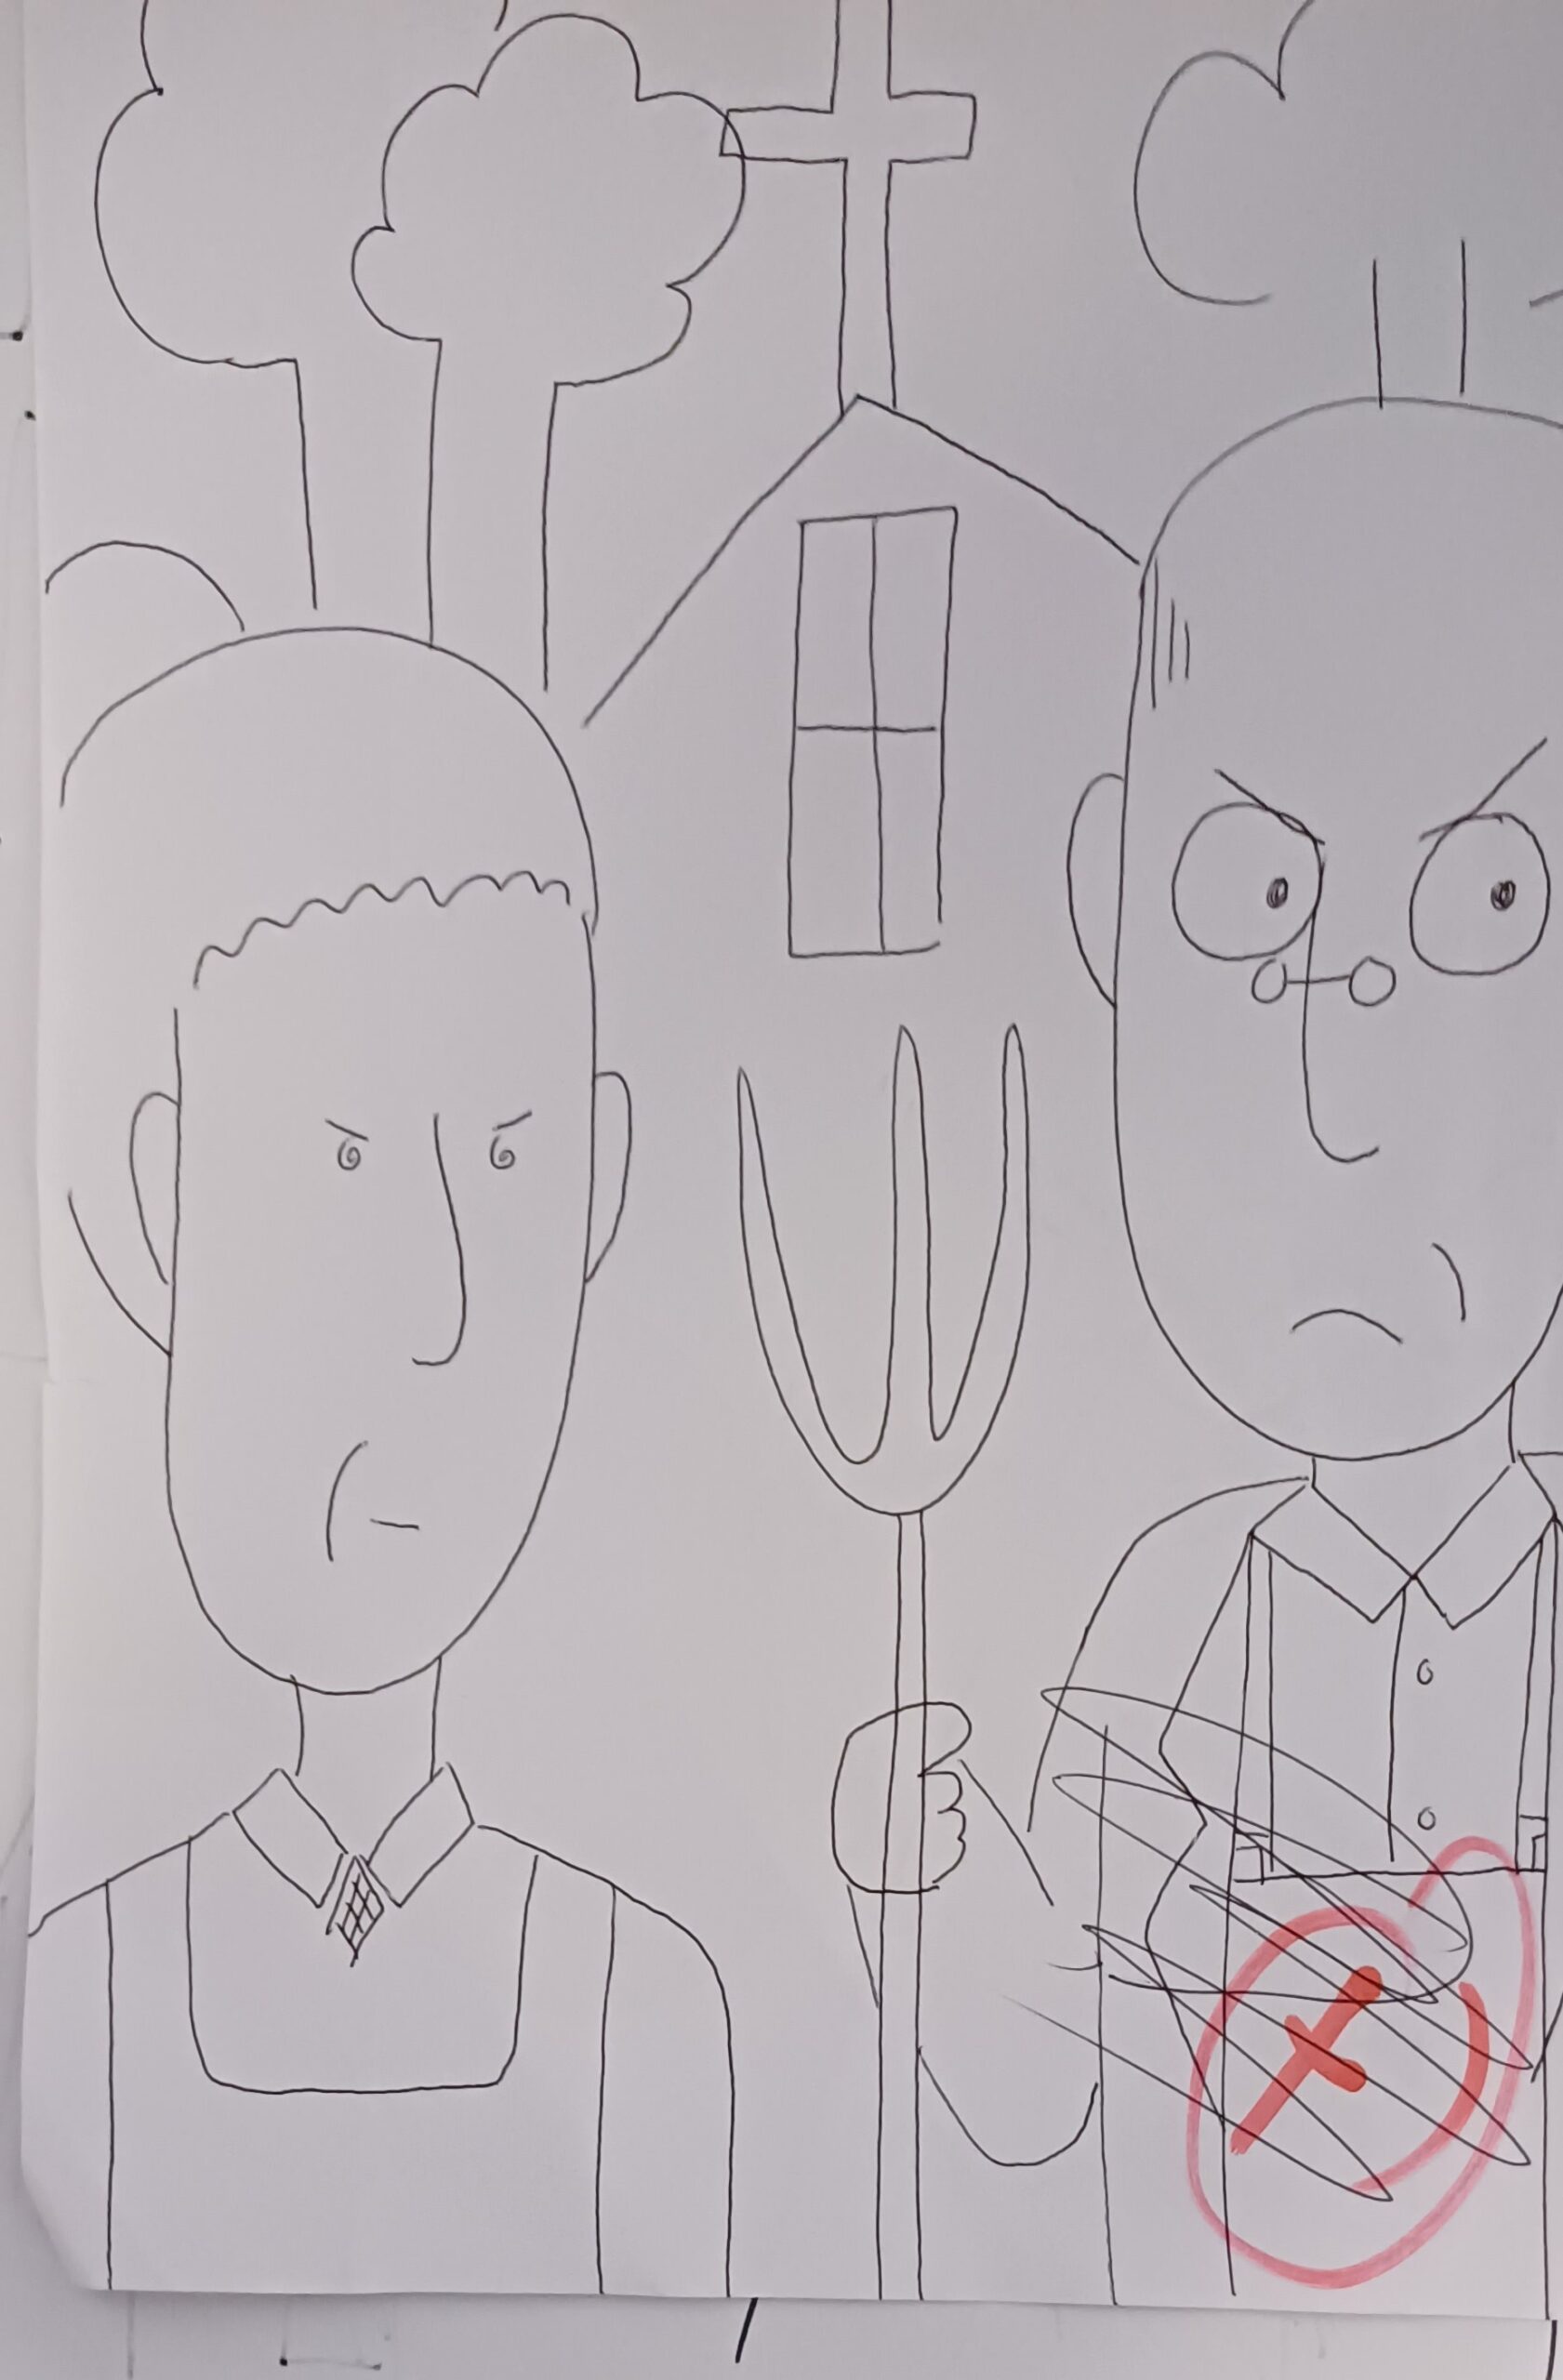
👩🏻🏫Here are the students’ sketches… aren’t they great? I love the glasses on the third one …lol (maybe I’m biased)
Student to Student
👩🏻🏫The exercise aims to produce an accurate sketch of a picture or photo. Therefore, the student in the describing role must try to include as much detail as possible in their descriptions. In turn, the student in the sketching role can double-check and ask for any additional information they may need.
In the exercise, students are first divided into pairs. One student is given a picture or photo to describe in detail to their sketching partner.
👩🏻🏫It is important to ensure that, in addition to the ‘listening sketcher’ not being able to see the original picture, the ‘speaking describer’ can not see how the sketcher’s picture is progressing. One way to achieve this is to have the students sit face-to-face but at a slight distance from each other. Another option is to have the students sit back-to-back, facing away from each other. This has the added benefit of eliminating any ‘helpful’ body language by the describing student.
👩🏻🏫This is not an easy exercise, and students may soon find themselves out of their ‘language comfort zone’ and struggling to describe the picture. It is here that the exercise takes another useful turn. All second-language speakers will find themselves in a situation where they lack the necessary vocabulary to communicate what they want to say. This exercise leads students to paraphrase and negotiate around the gaps in their language to convey their intended meaning.
👩🏻🏫Of course, the choice of picture is essential for the exercise. When selecting material, it is a good idea to view the image from the student’s perspective and imagine the challenges they would face in describing it. In reality, the image shouldn’t contain more than a few details of interest to avoid making the activity too difficult. Challenging but not impossible is the mantra. During the exercise, it is essential for the teacher to actively monitor the class to ensure that students are not cheating and are using only English, as well as to guide and encourage them as much as possible.
Choosing a picture to use
👩🏻🏫I’m sure you already have a few ideas of pictures or paintings to choose from, but if you’re struggling, here are a few pictures I’ve used in the past that may be helpful. All of them have their challenges to describe, but they are not so tricky that either the describing student or the listening student gives up on the task.
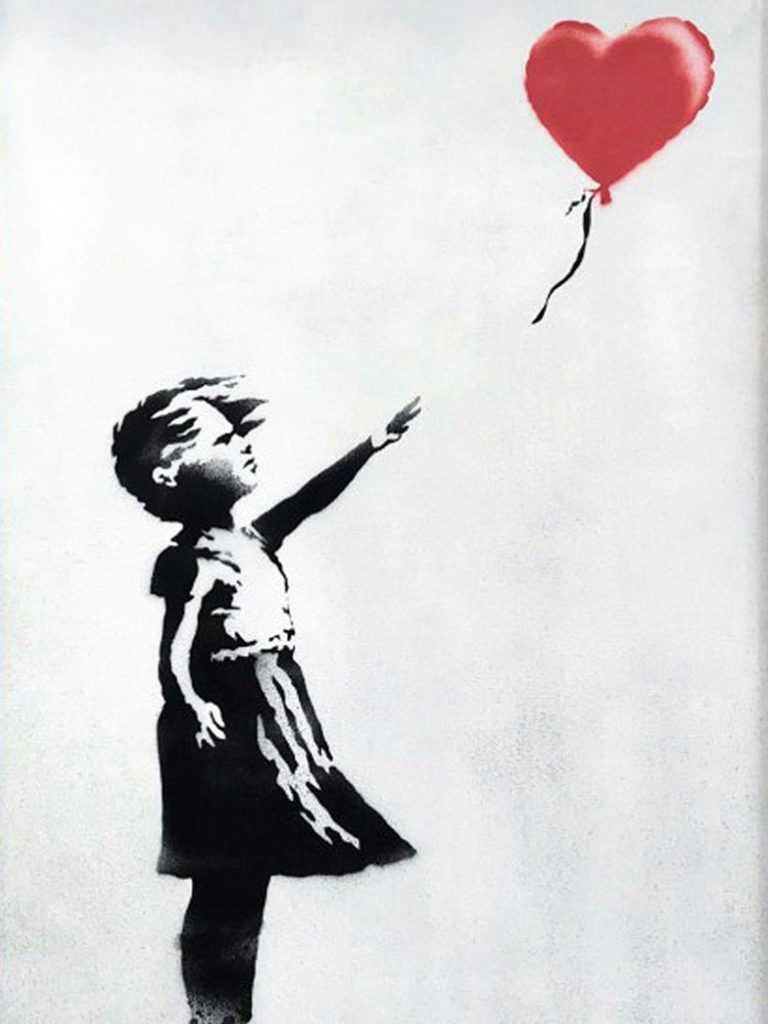
‘Girl with a Red Balloon‘ (2002) by the street artist Banksy is a nice, simple one to try. There is no really difficult vocabulary, and most students usually make a good attempt at describing and sketching this painting.

‘The Son of Man‘ (1964) by Magritte is an iconic yet relatively simple painting, similar to ‘American Gothic‘. I like it because even low-level students can describe and sketch out the basics of the picture. Higher-level students can try to explain and sketch some of the minor details of the painting.

Anything featuring the Simpsons will be useful because they are relatively easy to sketch. Anything where a Simpson invades a classic painting is double-bubble good!

‘The Caveman‘ (2008) is another fun painting by Banksy and offers the students plenty of challenges to negotiate meaning in describing this fine fellow. To avoid any embarrassment, I would pre-teach the word ‘shadow.’
Debrief Session
👩🏻🏫At the end of the activity, students can compare their sketches with the original painting. They will be aware of details they struggled to describe or sketch in the painting and will be interested in how it should be done. So, while everything is fresh, the teacher can discuss how they would describe the details in the picture themselves. This way, students can follow the teacher’s description to see what they said correctly and incorrectly, so they can hopefully improve their efforts in the next session.
……………………………………………………………………………………………………………………………………………………………………………………………………………………………………………..
For a wide range of fun exercises to do in the classroom, I offer a one-stop classroom activity book suitable for students of all ages and levels.

Ok, let’s crack on to the next lesson!